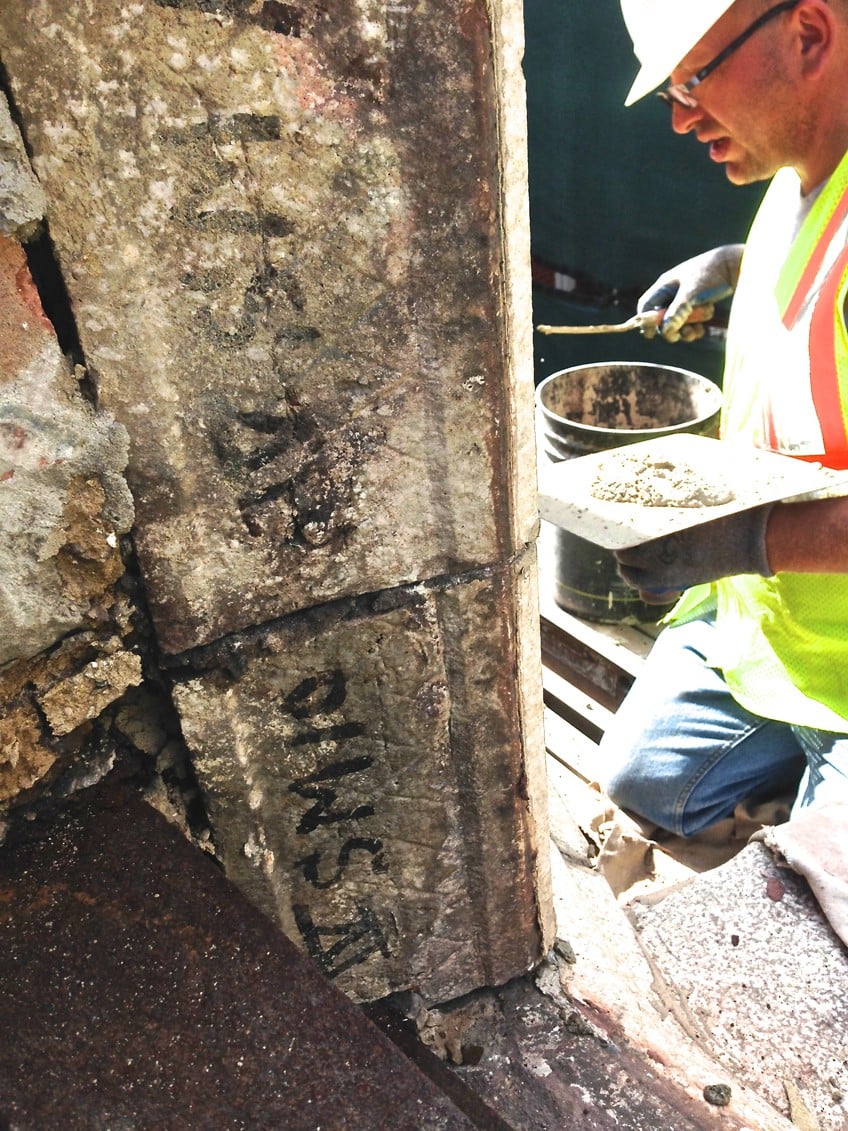
For the next few weeks we are back in Oak Park working on a lovely double-courtyard brick and terra cotta condominium building constructed in the very early 1900s. It is always a pleasure working on masonry buildings of this vintage because the materials used were of the very highest quality and the building methods employed by the original masons were so fantastic. We consider structures erected immediately following the Great Chicago Fire of 1871 through the 1920s to be some of the very best examples of masonry construction ever produced in the Midwest, a period during which enduring quality was of paramount importance. (These days, the drive for quality appears to have been supplanted by the drive for quick profit, as evidenced by all of the split-face block, engineered stone and brick veneer we see in newer masonry structures.)
In the photo at rightabove, Adam is about to start tuckpointing a portion of the 100-year-old terra cotta parapet wall. As you look at the edge of this parapet wall, you can see how each piece of terra cotta was hand-numbered by the original terra cotta fabricator a century ago. The edges of the terra cotta pieces will be covered up with closely matching wire-cut face bricks and tinted mortar as the rebuilding continues. Perhaps AAA-1 Masonry & Tuckpointing will have the opportunity to rebuild this parapet wall in another 100 years?
Whether your masonry structure is a century-old brick and terra cotta building like this one or a single-family home constructed in the last 20 years, we have the experience to diagnose and address your masonry issues. We look forward to working with you!
Post: Whatever the Job Requires!
Monday June 15, 2015
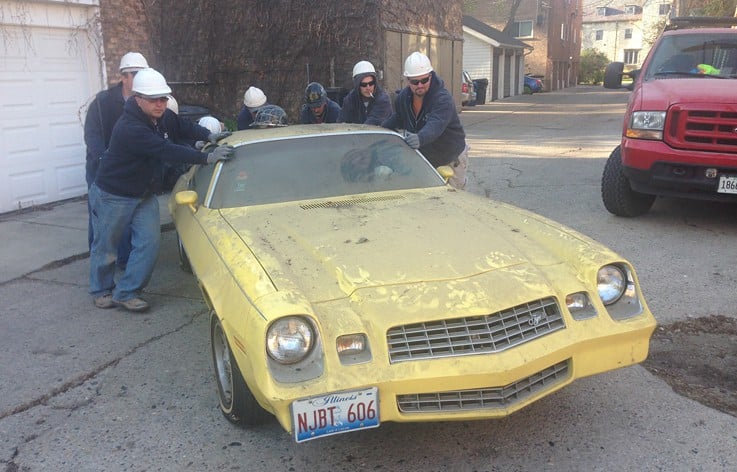
Recently AAA-1 Masonry & Tuckpointing's licensed masons were called out to repair a 1920's multi-unit building on the north side of Evanston. Little did we know that the job would require the relocation of the Owner's inoperable 1975 Pontiac TransAm prior to starting our work (we later learned that the car had not been moved in over 4 years…that's four years of dust on the car!)
As is often the case in the restoration business, you never really know everything a job will entail until you get started. Fortunately, many hands make light work, and our 8 pushers and 1 driver were able to make the necessary 5-point turn in the alley and get the car situated on a grassy spot a few yards away.
(By the way, the masonry work looks spectacular!)
Post: Residential Chimney Project in Glencoe
Tuesday June 2, 2015
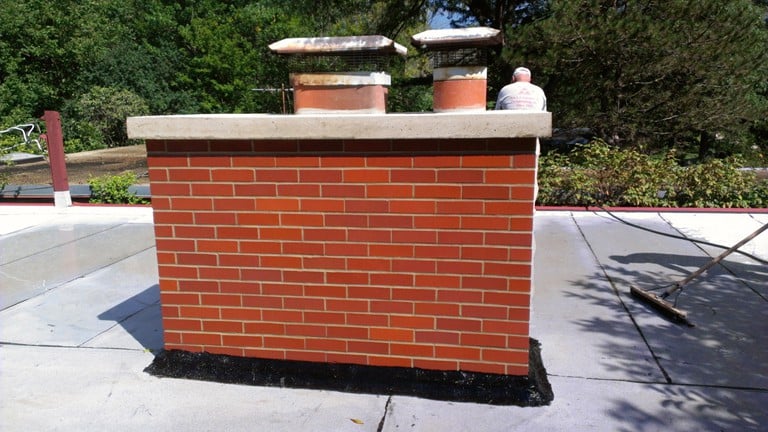
Shortly after moving in, the new owner of this 1950's-era ranch observed heavy efflorescence on the exposed brick chimney shaft in his living room and on the adjacent ceiling. A new roof had just been installed by a reputable contractor (Warner Nelson at Star Roofing & Siding) so we knew the roof was not the culprit.
The new owner had been told that the rebuilt chimney was about a decade old (that's considered a young chimney by our standards), so we popped up onto the roof to have a better look. A close-up inspection revealed a concrete chimney cap cracked in multiple places and very poor mortar adhesion between the bricks (this can happen when ambient temperatures during construction are too high so the mortar dries too rapidly, when the mortar freezes before it has completely cured, or when the mortar has not been mixed correctly). After we removed the roof flashing at the base of the chimney, we were surprised at the extent of the brick erosion and failed mortar.
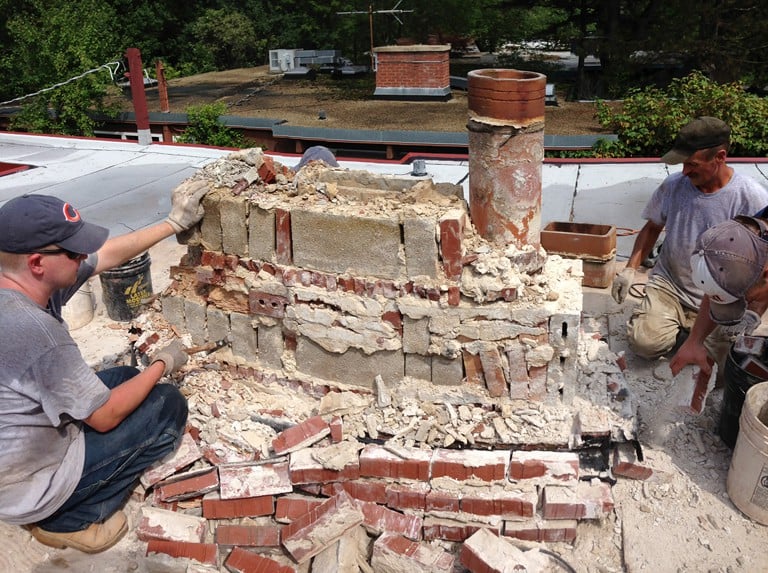
As we dismantled the chimney we were disappointed to see how the previous mason had elected to rebuild the structure. It was a mess. The mortar contained much too much Portland cement, making the mortar too hard for the bricks and virtually guaranteeing the chimney's early demise; improperly sized flue tiles had been used creating a drafting issue (and, potentially, a carbon monoxide issue); and cinder blocks had been used indiscriminately. (We are not fans of cinder block construction.)
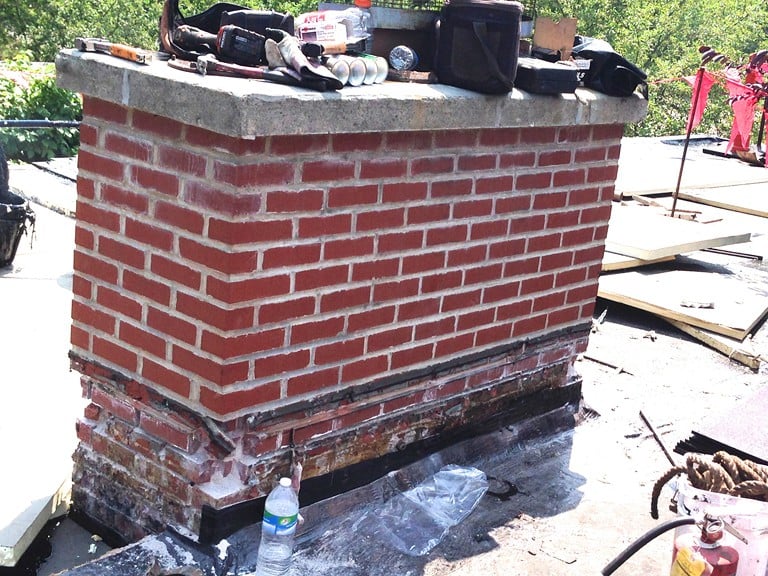
After dismantling the defective chimney down to the roof deck, we set about rebuilding the chimney the correct way:
- We used Belden bricks (some of the best clay pits in America are located in Belden, Ohio). These Belden Colony Red Range bricks are more than double the cost of similar looking bricks but will last for generations…the way all bricks should perform. An added benefit was the spot-on color match with the brick facade which the new owner appreciated.
- We used only Type N mortar, which provided the right balance between strength and softness so that the bricks will not spall or crack apart prematurely.
- We worked within the right temperature range so that the mortar cured slowly and appropriately and bonded well to the bricks. (We wetted the bricks as we worked just to be sure.)
- We saved the owner the cost of replacing the metal rain caps because they were in structurally sound condition and could be re-used.
- We cleaned up the job site and removed all traces of debris so that the roofer could return to permanently re-flash the base of the chimney using modified roof flashing and galvanized counter-flashing.
Whether your project is a residential chimney or a mile of parapet wall rebuild, we treat every job with respect and care. Exactly what you should expect from a masonry restoration company in continuous operation for over 60 years.
Thank you for the opportunity to be of service!
Post: AAA-1 Masonry & Tuckpointing is Your Restoration Company
Saturday May 9, 2015
This week a new client and I were reviewing the restoration work we had just completed on her house. The brick match was impressive, our mortar match was spot-on, and the homeowner was ecstatic and effusive with the compliments. (Even after 60 years in the business we never grow tired of hearing these.) This was a client who really had done her research prior to hiring us. And part of that research had included scouring every page of our company's website.
I asked her what she had thought of the website since its development and maintenance has been a real labor of love for me. I take every photo and write every bit of text on the site. I continue to spend several hours each week ensuring our website is easy to navigate, enjoyable to view and read and, hopefully, elevates the viewers' understanding of what quality masonry restoration work is all about.
Toward the end of the meeting, my new client hit me with a comment that really surprised me. She said that AAA-1 Masonry's website was visually impressive, easy to navigate and very educational, yes, but it gave her the impression that the company only worked on very large projects for very big money. That was a shock to hear since about half of our projects range in duration from 1 — 2 days. Last night I went to the company's website and reviewed the images and text on the home page, the blog, and everywhere else on the site. My client was right. In an effort to show off our talents and passion, I had focused almost exclusively on our higher-profile projects. It was an unintentional gaffe. So, to be clear, we're passionate about masonry restoration work regardless of the scale, location, or price. Going forward I will try to include a better balance between featuring the grand, multi-month projects and the smaller (but equally as important) residential projects we tackle.
So, if your residential chimney is beginning to lean, the parapet wall on your mother-in-law's two-flat is wavy or starting to crumble, or you have begun to notice water infiltration through your home's brick, concrete block, stone or terra cotta walls, then the seasoned craftsmen at this company know what to do. Why? Because masonry restoration work is all we've been doing for the last 60+ years — and this depth of experience applies to the senior management, the project managers, the foreman and the crews. (In fact, many of the foremen were once masons, tuckpointers and laborers at this very company decades ago.)
We grind deeper, fill a head joint more fully, prep our replacement steel more completely, and know more about the art of masonry restoration work than any other firm working in Chicago, the North Shore or the western suburbs. Period. We value quality over speed, and integrity over profit. And if you allow us, we will leave you with an enduring product that is sure to garner compliments for years to come (you can read some of them on our homepage and in the Testimonials section of the website).
Thank you for the opportunity to be of service!
—Rob
Post: Restoring Fourth Presbyterian Church's Historic Fountain
Monday April 6, 2015
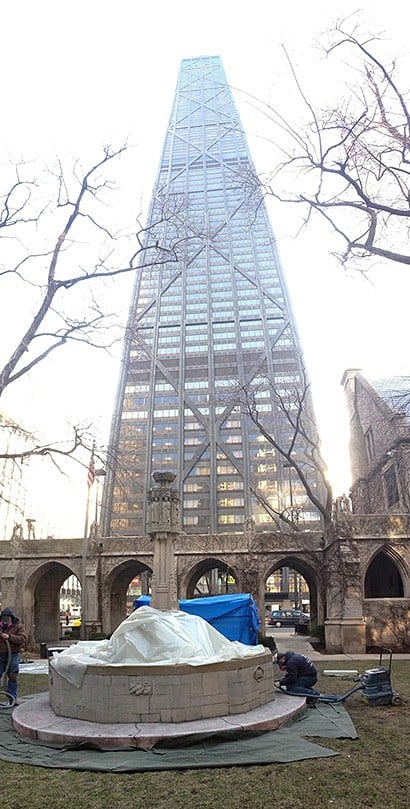
This spring, AAA-1 Masonry & Tuckpointing was granted the rare and distinguished honor of restoring the Fourth Presbyterian Church of Chicago's iconic hand-carved limestone fountain.
This beautiful century-old Howard Van Doren Shaw-designed limestone fountain sits in the courtyard just beyond the cloister fronting Michigan Avenue (formerly Pine Street during the time of its construction in what was considered to be a fairly undeveloped part of the city).
With the exception of the Chicago Water Tower, the church building is the oldest structure on Michigan Avenue and is listed on the National Register of Historic Places.
In 1884, the congregation worked with Rush Medical College to establish the city's Presbyterian Hospital (known from 1969 – 2003 as Rush-Presbyterian-St. Luke's Medical Center, and since 2003 as Rush University Medical Center).
